
Managing Users
🗓️ Last updated on June 13, 2024 | 3 | Improve this pageOverview
This guide will show you how to use the Users Management capabilities of the Microcks Web UI.
Your can partially manage users directly from the Microcks UI. “Partially” means that you are able to manage a user’s rolesand groups within Microcks but that you’re not able to create a new user. This action is reserved to your Identity Provider used through Keycloak configuration or to Keycloak itself if you choose to use it as a provider. Please check the Identity Management section of the Security Configuration reference for more information on that.
🚨 Prerequisites
Users can only be managed by Microcks
admin- we mean people having theadminrole assigned. In order to be able to retrieve the list of users and operate changes, the user should also have manage-users and manage-clients roles from realm-management Keycloak internal client. See Keycloak documentation for more on this point.
1. Roles management
Users management is simply a thumbnail with the Administration page that is available from the vertical menu on the left once logged in as administrator.
On this page, you can easily search users using their name and they’ll be listed, organized in pages. On each line of the list, you’ll have the oportunity to check the different roles endorsed by a user.
- Registred means that the user has already sign-in within Microcks and has been just endorsed with the
userrole, - Manager means that the user has been ensorded with the
managerMicrocks role, - Admin means that the user has been ensorded with the
adminMicrocks role.
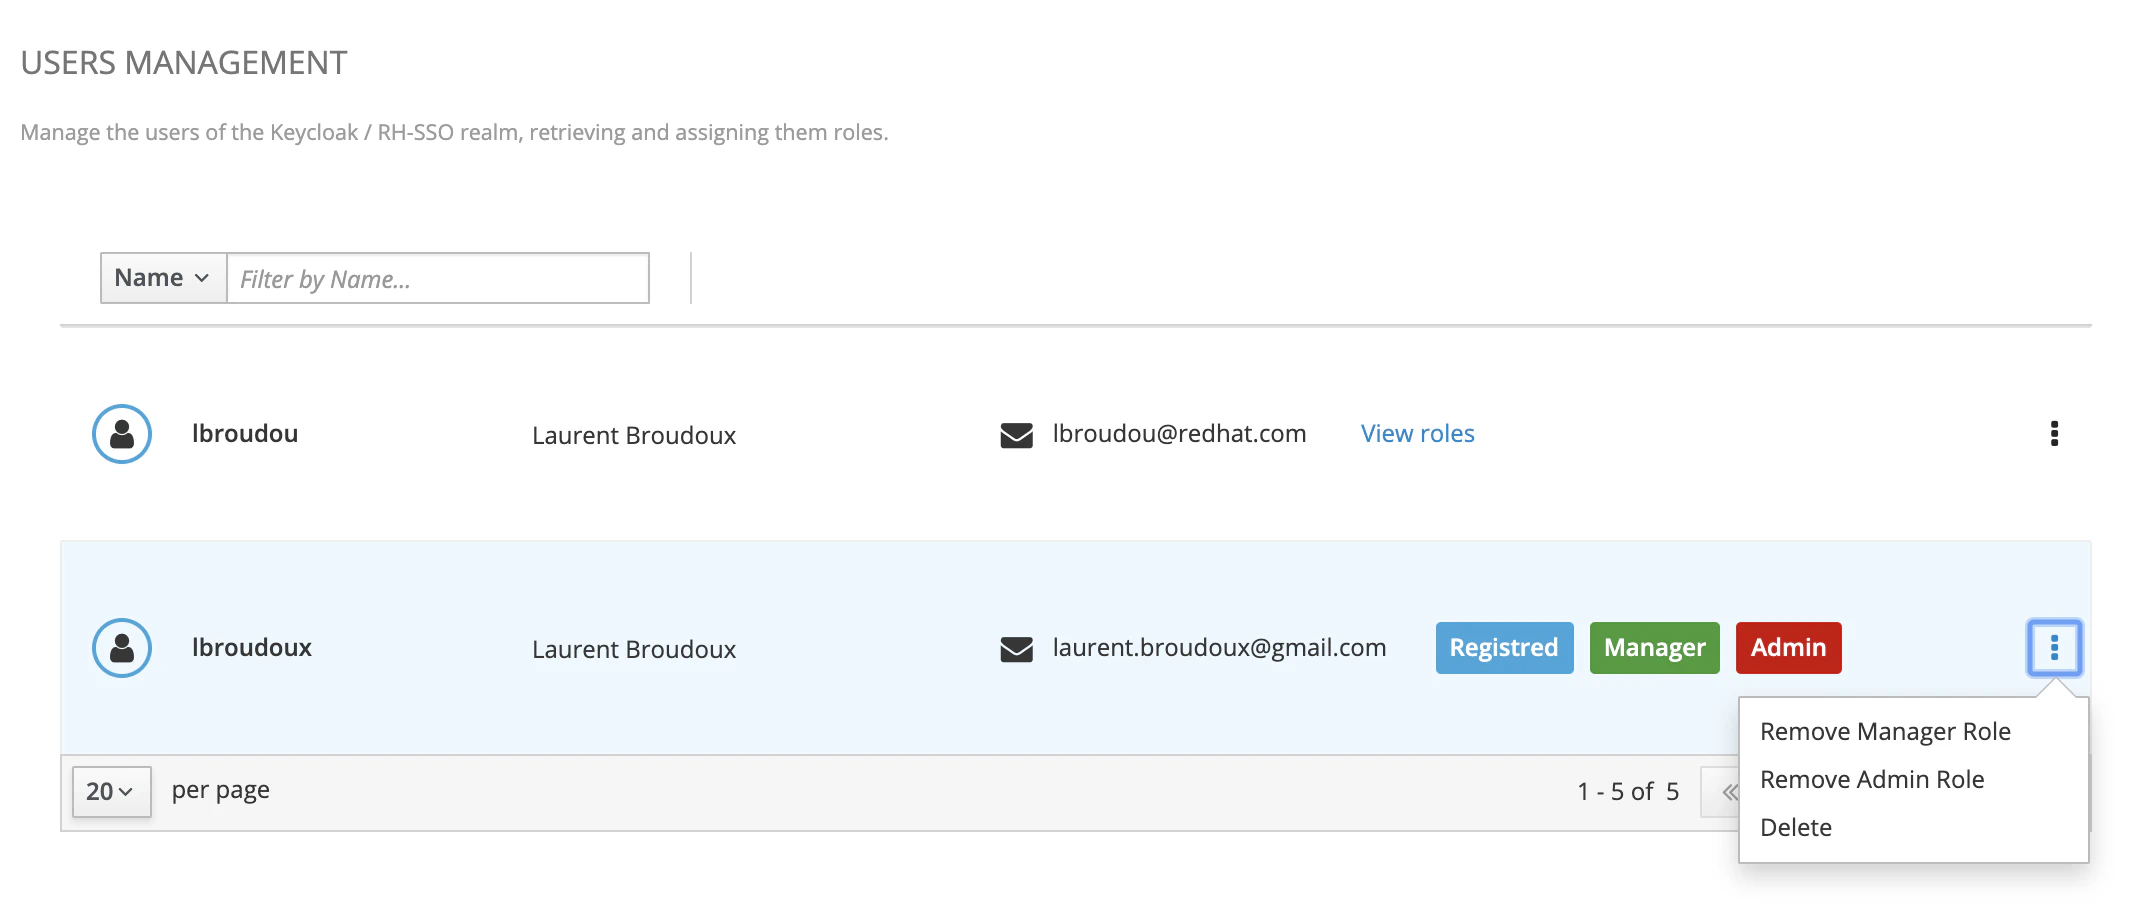
From the 3-dots menu on the end of the line, you have the ability to Add or Remove the different roles.
💡 If you encounter any error while fetching users or roles, this probably means that your roles on realm-management Keycloak internal client are not correctly setup. Please check this part.
2. Groups membership management
If you have enabled the segmentation of management roles on a master label you have chosen for organizing your repository (see Organizing Repository
), you will also be able to assign groups memberships for managers.
When this feature is enabled, Microcks will create as many groups in Keycloak as we have different values for this master label. These groups are organized in a hierarchy so that you’ll have groups with such names /microcks/manager/<value> those members represents the manager of the resources labeled with <value> value.
Also, a new Manage Groups options appears in the option menu for each user. From this new modal window, you can easily manage group membership for a specified user as shown below:
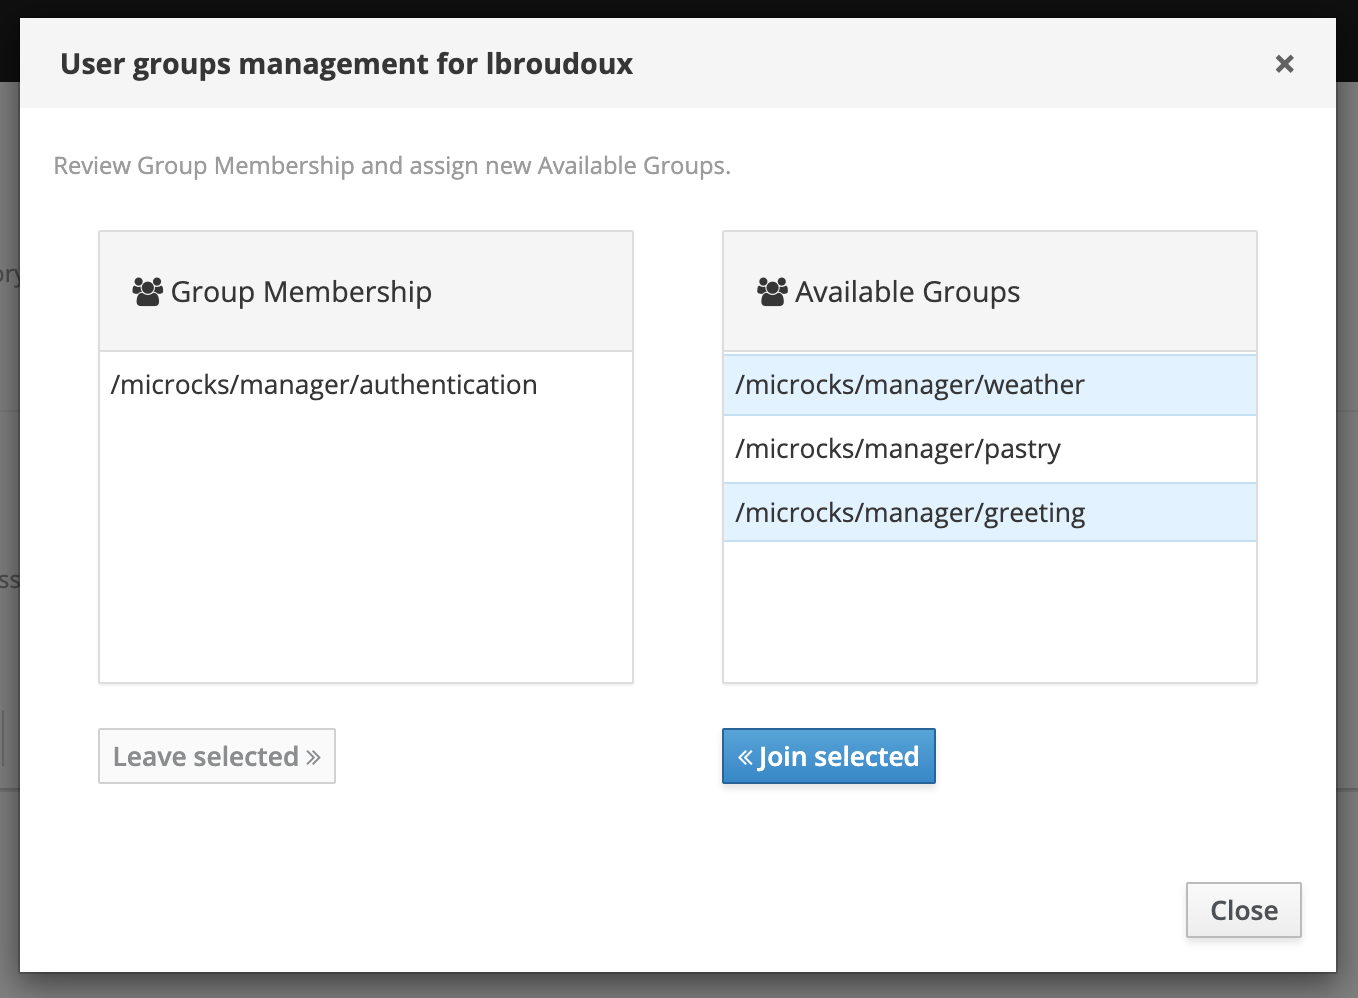
🚨 The groups in Keycloak are actually synchronized lazyly each time an administrator visits to this page. For some unknown reasons, it appears that the sync can be delayed from time to time. Before raising an issue, please visit another page and come back to this one. 😉
Wrap-up
This guide walks you through the Users Management capabilities that are available on Microcks Web UI. We hope you learned how straightforward it is to manage users roles and groups, once your administrator users has the corrent Keycloak realm-management client correct roles.
Feel free to pursue your exploration with Security Configuration reference for all the things related to Identity Management or security in general.

Still Didn’t Find Your Answer?
Join our community and get the help you need. Engage with other members, ask questions, and share knowledge to resolve your queries and expand your understanding.
Join the community